

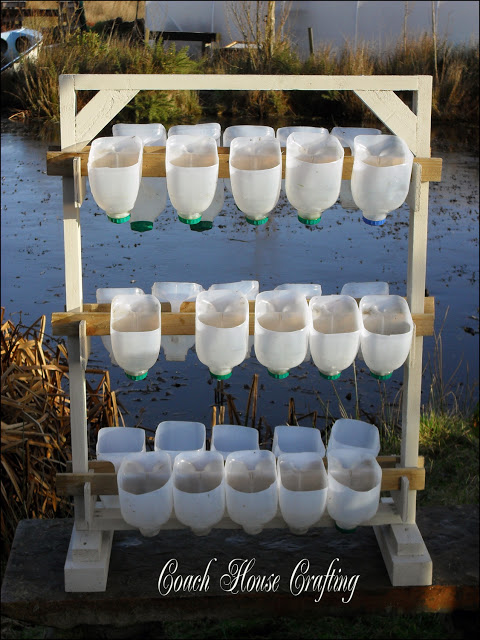
The Greenhouse Space Saver
How to Make a Greenhouse Space Saver
Tools and materials required
- Scrap wood. You can use any scrap wood. I used batten, 3"x2" and ply board.
- Wood to use as the milk container supports. I used 1.5"x 1/4" beading.
- Screws and/or nails.
- Hand saw or electric cutter.
- Tape measure (always handy but I hardly ever use them).
- Stain for protecting. (I used Cuprinol garden shades Natural Stone).
- Plastic milk cartons. I used 30 on mine but you can make the frame and add the cartons as you collect them.
Procedure

#1 The first stage is to make a rectangle frame using battens (or your chosen wood).
Then add corner supports to the top of the frame only.
I didn't have any particular size of frame in mind. I simply made it up as I went along - that's how I roll!

#2 Once we have the frame made we need to attach some feet to support it.
I used batten and 3"x2" for mine.
Cut the batton.
Then screw or nail it to the bottom of the frame like in this photo.
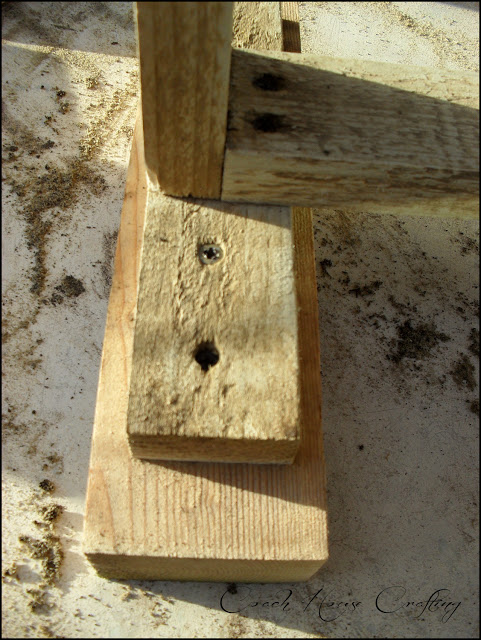
#3 Attach the feet to each side of the base end. Then stand the frame up.
Next cut 2 more pieces slightly larger from 3x2, or whatever wood you have.
Screw or nail these to the existing feet from the top down.
You can also see from the photo that I screwed the rectangle frame down into the first foot that was attached. This is just for extra stability.

Make Supports
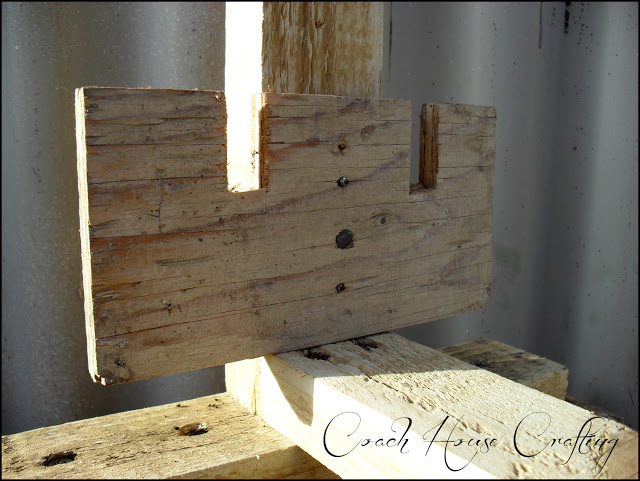
#5 Once all the rectangles are cut and grooved they simply need attaching to the sides of the frame.
I just spaced mine at equalish distances.

#6 Once this is completed it's just a simple case of cutting 6 lengths of wood for the container supports. (I used thin beading.) Make sure the lengths are cut long enough to extend further than the supports at each end.
#7 Finally give it all a coat of protective paint. Then start filling it with your pots by simply sliding the container supports through the handles of your milk containers.
Greenhouse Space Saver Uses
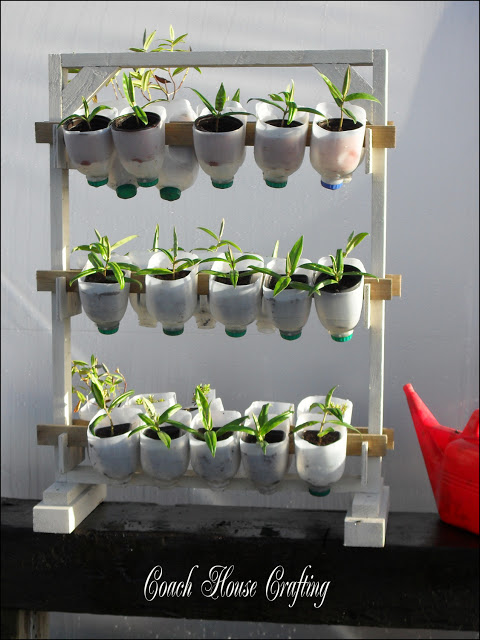
How to Make the Containers into Useful Garden Helpers
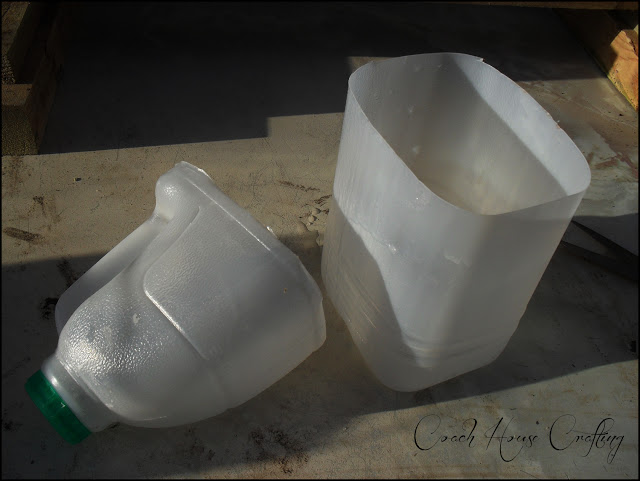
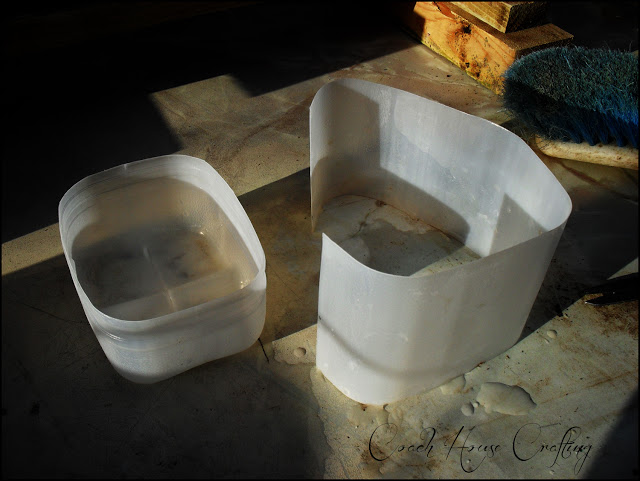
Wait ...don't throw out the rest of the container!
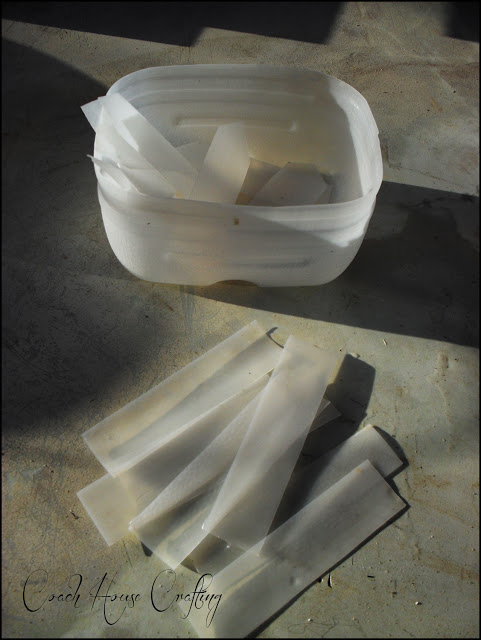
Make Plant Labels
See, the whole container has a use - yay!
I hope this tutorial made sense to you all and that you can replicate it in some way for your home and garden, I would love to hear from anyone that has made one.
Linda

Linda is a gardener and crafter who lives up in a remote part of the Scottish Highlands along with her family, 5 dogs, 3 cats, 4 hens and numerous Birds of Prey. Since moving to Caithness she has found that a polytunnel is an essential part of gardening due to the weather extremes and she loves to recycle bits and pieces to make them into useful things for the garden.


Pieces of Sunshine
Great idea, very useful and resourceful.
Tom Stewart
I visited your Blog for the first time tonight and I will return to read the rest of your posts! I was impressed with the first picture I saw! You see I'm a big beliver in recycling when ever I can! And this is a great idea which I will use this spring!
My Blog worms-a-crawlingfarm.blogspot, I write about Homesteading in general and raising compost Worms! Come by when you get the chance and take a look!
Tom
Andrea
Hi Rosie, i love what Linda did. I am trying to do bits and pieces like her myself. But i love that stand, although i cannot do it as i still need to buy wood. In my case, i elevated some wide slabs of wood to make a garden bench, and i used leftover hollow cement blocks as platforms of both ends. This way our chickens have a bit difficulty in reaching for the plants leaves. Gallons of mineral water bottles are also cut like those, but i utilized both halves as plant pots, i just make holes at the bottom. We dont have those milk bottles, but they are sturdier and more beautiful hanging like that. I think they will also be good for hanging plants, or even vegetables for urban gardening.