

Today I've got something really interesting to share. It's a free plugin called Pixel Bender and my favourite preset is 'Oil Painting'. I've been getting quite a few emails and comments recently about a particular way that I edit some of my flower shots. As a result most of last week I tried to have a theme for my photographs that would involve using the Pixel Bender from Adobe Photoshop. Now just don't stop reading here if I hear you say that you don't have photoshop. Because the pixel bender oil painting plugin can also be used as a stand alone editing program!
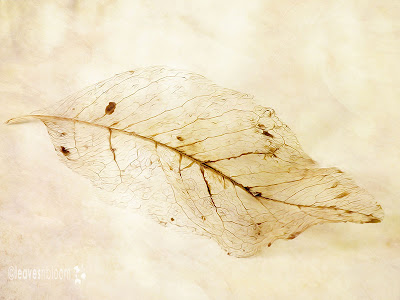
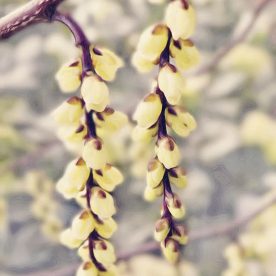
Pixel Bender Edit 1
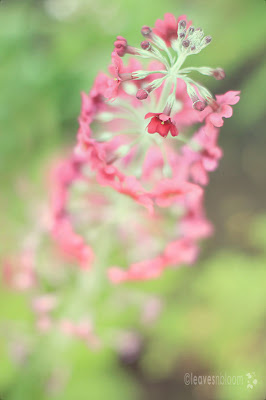
This image from the Greensleeves primula seed mix has been edited very subtly with pixel bender. Consequently just the petals show the oil painting effect.
The whole photograph was originally all showing bended pixels. But after I edited it with the plugin I then created a new layer with a gaussian blur. I left it on the background and brushed it off the primula flowers.
Downloading Pixel Bender
I'm not very good at downloading plugins for photoshop unless the plugin finds the right place itself to download to. I was so relieved last year when I discovered that pixel bender was easy to install (unlike some other plugins).
I've also used it as a stand alone editing program on my desktop. It was easy to install though the pixel bender interface is easier to understand in photoshop.
Once downloaded - close photoshop and then re open. The plugin should be somewhere at the bottom of the list of options once you click the filter tab on your photoshop dashboard.
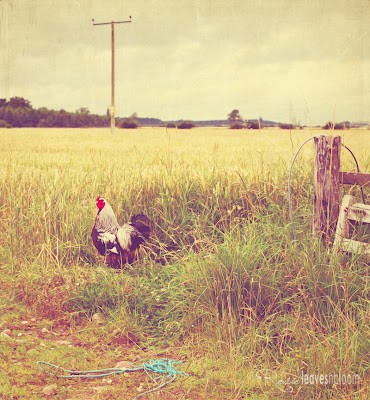
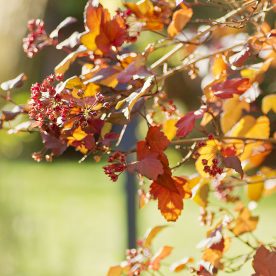
Pixel Bender Edit 2
The colours are a little more saturated with this image as I had the colourisation tab a little bit more to the right.
If you press OK after tweaking about with the sliders but then decide that you really are not happy with the image you can go to edit on the photoshop dashboard. Then choose to fade the pixel bender or even add a few actions, adjust the levels or add a texture.

Problem Solving with Pixel Bender
Pixel size
Sometimes the bender won't work because the photographs you are trying to edit are too big. Try and reduce the size of them or else if you are techie minded you can check out your graphics card and drivers. I normally edit around 2500 pixels wide in size as anything over that results in a blank screen at some point in the editing. The bigger your image the longer it takes for the sliders to show your adjustments. Sometimes I just have to go back into photoshop and reduce the size a little more.
I've been told that even when you reduce the size of your photo for the oil painting pixel bender once you bring it back into photoshop again you can increase the pixels to the size they were originally without there being any noticeable reduction in picture quality.
Memory and Graphics Card
On a few occasions I used to get an error message stating that I didn't have enough RAM on my computer when using the plugin. Now that I've upgraded my laptop I don't get this message any longer. But if you do it's probably because you had a long working session in photoshop. So I would just save my work, close photoshop and then reopen it again to refresh the memory.
It's easier on a 64 bit computer. The sliders move faster and you can edit larger images.
Pixel Bender Oil Painting Tips
- I only used the oil painting selection on the images on this blog post.
- Before you do anything in pixel bender make sure that you are working with a clean edit of your photograph.
- You can use the background image layer as your working layer in pixel bender. Or else make a new layer and work on that.
- Once back in photoshop blend the layers with whatever blending mode looks good and adjust the opacity.
- Once your photograph is back in photoshop click on the edit button at the top of the screen and fade the pixel bender if needed.
- Noise in the photographs can certainly make them more interesting with this plugin.
- If there is a piece of the background that is really distracting I would either clone it out, use the healing tool or gaussian blur before bringing the photo into pixel bender.
- You can add textures to your pixel bender edit as well as all the other adjustments and actions in photoshop.
Unsharpen Mask and the Preview Window
The one thing that really makes your pixel bender images pop is the unsharp mask. Therefore this should be the very last edit you do to your photo before saving. Every photograph will be different as to how much you sharpen it by. But my tip is to use your mouse on the window preview that pops up once you decide to use the unsharpen mask. Then left click on the window to show the image unsharpened. Once you release the mouse it will show you the sharpened image.
Once I unsharpen I always go to:
- edit
- fade
- unsharpen
- keep the opacity at 100%
- then select luminosity
Here is an advanced tutorial using the plugin with smart objects.
You can download the plugin here:
- download pixel bender plugin or standalone version
- if you've got CS6 or are subscribing on the adobe cloud then pixel bender is already one of the filters in the program.


Chic Homeschool Mama
Those are jaw dropping AMAZING- WOW just doesn't express how in awe I am of those. LOVE them! Great job.
Mom of M&Ms
OH MY! those are beautiful.. na di will probably never download it.. cause it scares the bajeebas out of me.. Love what you do!
Mildred
These pictures are so lovely. I have thoroughly enjoyed each and every detail. Wishing you a nice week Rosie.
Mrs Missy
Beautiful!
Jill Samter Photography
wow wow WOW!!!! these are amazing 😀
Ashley Sisk
I'm actually really glad you went into more detail on pixel bender. I was going to do one of my edits with it on Thursday. I think I'll redirect back to this post rather than doing my own write up. I think I'll also explore the features that PS does offer with regard to an artsy edit. I'm glad to hear that it can be used stand alone too because many of my readers don't use PS. Thanks Rosie!
Jaime
Nice job! I really like the oil painting effect on the yellow flower.
Cedar
Oh! I just thought you had some amazing flowers I had never seen! These are lovely, and I love your SOOC shot also! What a fun plug-in! Thanks for the lesson.
Kimberly
Gorgeous! Love the SOOC shot! And what fun you can have with the plug-in! I might have to play around with it.
Liz
very cool I have elements 9 will it work with that?
Susan
These are all just amazing!!! Love them…
Courtney
First of all, your blog looks amazing! Very nice! But your shots are stunning! Even the SOOC is perfect the way it is. But the pixel bending thing is pretty incredible. I had to download it and gonna try it out. Thanks, Rosie!
Michelle
First — love your sooc shot! (and I'm so glad you found it, too! hehe! I had almost the same experience just a few moments ago! AH!)
And that pixel bender looks really cool and artsy! I especially love your last two shots.
Have a great week, Lady!
Michelle
Kathleen
So pretty! I knew this week's theme would be right up your alley – you didn't disappoint! 🙂
Tracy
Love the first one!!
The last oil painting one is beautiful!
AJ
So pretty and creative…love it!
- Jessi -
i love the first one, Gorgeous!
Sarah Halstead
That is awesome. Thanks for sharing. I just got an old version of photo shop on our Mac. I will have to try and install that later. Thanks for sharing!
Kristal
That is so cool!
Jenn
WOW, wow, wow! You are an amazing photographer! Thanks for sharing all this info and all your beautiful flower photographs!
Christine
Rosie, that purple/yellow flower edit is amazing. I love the droplets of water on the petals. You are an amazing flower photographer!
Blessings,
Christine
Ray
Beautiful photos!
ashley
What an amazing effect! Very neat!
Dina @ 4 Lettre Words
These are so, so cool, Rosie! I just downloaded it and can't wait to start playing. 🙂